Administrative Reports
Administrative Reports have been rebuilt and improved, allowing more flexibility in pulling reports and the ability to save and re-run reports.
Navigate to Administrative Reports
MyPack Portal > Student Information System homepage > Reporting Tools tile > Administrative Reports
- Log into MyPack Portal
- Select the Student Information System’ homepage
- Select the ‘Reporting Tools’ tile

- On the left-hand navigation bar, select ‘Administrative Reports’
Using Administrative Reports
Student Population
Enrollment Status: Select the enrollment status of the student population: All eligible, Eligible and enrolled, Eligible not enrolled
Term: Select the term for the reported information
Selection Criteria: Identify the student population for the reported information. Your selection can be as broad as the career/program level or down to the sub-plan level. Use the ‘plus’ button at the far right to add additional criteria (i.e. more than one plan) or use the ‘minus’ button to remove selection criteria from your report.
If selecting the plan type of Minor or Certificate, select ‘All’ for the program.
Organization Quick Pick: Select the Reporting Career, the Plan Type and Academic Organization. Select the Add to Selection Criteria and all plans owned by the selected Academic Organization will present as Selection Criteria.
Filter Criteria
Report Filters: Allow a report to return a sub-population of the selection criteria based on a selection of fields and conditions.
Select Directory and Personal Data fields
Data fields selected from these two lists will return on the report.
Manage My Reports
Once a report has been built, it can be saved to run in the future. Add a Name in the Current Report Name field and select ‘save.’ To load a saved report, select the radio button next to the report and select ‘load.’
Running a Report
Select ‘GO’ at the bottom of the page to run a report. To download the report, select the ‘download to Excel’ icon at the top of the report:
Select the ‘Selection Criteria’ tab at the top of the page to move back to that content from the report results.
Student Notifications
To send an email notification to the students on the report, select the ‘Send Notifications’ button at the bottom of the report. All students on the report will be blind copied on the email you develop. The ‘from’ address will be your ncsu.edu email address and one attachment can be included in the email.
Query Manager
Navigate to Query Manager
MyPack Portal > Student Information System homepage > Reporting Tools tile > Query Tools > Query Manager
- Log into MyPack Portal
- Select the Student Information System’ homepage
- Select the ‘Reporting Tools’ tile

- On the left-hand navigation bar, select “Query Tools”
- In the Query Tools drop down menu, select “Query Manager”
Using Query Manager
Search By – Select the manner by which you would like to search in the drop down menu
In the box following the “begins with” prompt, type in the full or partial name for the query you would like to search
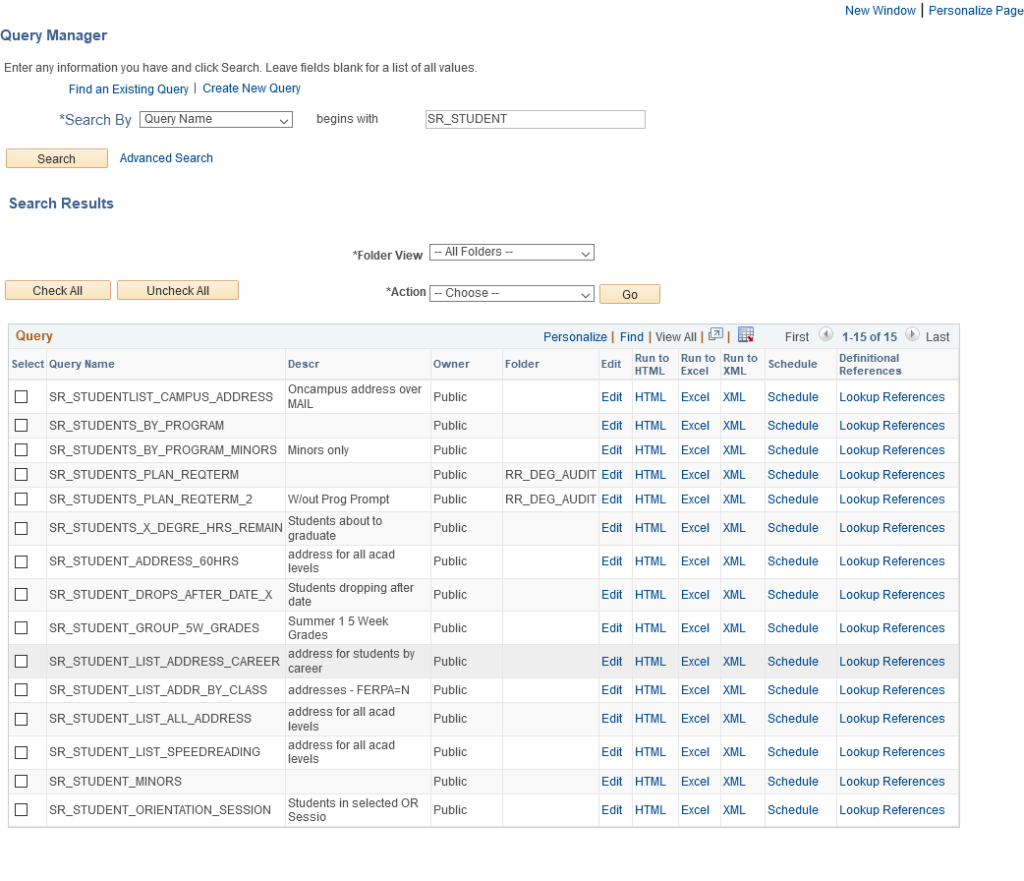
You will be presented with a list of all existing queries that match your search criteria. The query list will display “Public” or “Private” in the “Owner” column, depending on who created the query and if it is visible to other users. The owner column does not impact your ability to view a given query.
- To view the content included in a given query, select “Run to HTML/Excel/XML”
- To add a query to your favorites, select the desired query by clicking the checkbox on the left and select “Add to Favorites” in the “*Action” drop down menu.
- **It is not recommended to delete or rename any query noted as “Public” in the “Owner” column as this may impact other users’ ability to search for said query.
- Once you’ve selected the query you want to view and the method in which you would like to view it (HTML/Excel/XML), you may be prompted to enter further information to tailor the scope of your query.
-
- For example: when viewing the SR_STUDENTS_BY_PROGRAM query, you’ll be prompted to enter the desired Term, Institution, Academic Program, and Academic Plan for which you’d like to generate results. (shown below)

Filling in the appropriate fields will generate a list of the students who meet the given criteria.
If you would like to request any information not accessible through the Query Manager please email Data_Requests@help.ncsu.edu