General Navigation
Overview and Common Terminology
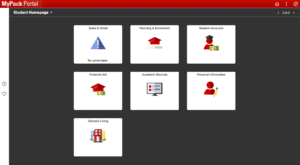
The MyPack Portal features easier navigation that is anchored by customizable homepages and fluid tiles. An example of the Student Homepage is seen here:
Common terms and tasks:
- Home Icon: The red house icon in the top right corner appears on all pages within MyPack. This icon will return you to your ‘first’ homepage.
- Actions List Icon: The three vertical dots in the top right corner houses frequently used links such as Personalize Homepage, My Preferences, and Sign Out.
- NavBar Icon: The ‘compass’ icon in the top right corner is where you will find your Recent Places, My Favorites, and the Navigator.
- Homepage: Homepages are the main information clusters such as Student Information System, Financial System, HR System, and more that you first see when you log into MyPack. You can toggle between homepages (if applicable) by clicking on the homepage name and selecting from the dropdown menu on the top left side of the navigation bar.

- Tiles: Tiles are housed on homepages and link directly to your most-used and relevant actions/information.
- Left-hand Navigation: Left-hand navigation appears after selecting a tile from a homepage. The left-hand navigation is collapsable and expandable.
Personalize Homepages
Reorder Homepages
To change the order that your homepages appear, navigate to the Actions List icon and select Personalize Homepage. Under the ‘Add Homepage’ button, drag and drop your homepages to select your desired order.
The homepage that appears first on this list will become your default homepage upon login. Be sure to select the green ‘Save’ button in the top right corner to save your changes.
Create a New Homepage
To create a new homepage, navigate to the Actions List icon and select Personalize Homepage. Select the ‘Add Homepage’ button. You can either select from available homepages or create a new custom homepage. Be sure to select the green ‘Save’ button in the top right corner to save your changes.
Add Tiles to Homepages
There are several ways to add tiles to your homepages.
1. If the tile already exists on a different homepage, you can simply copy that tile by following these steps:
- Actions List > Personalize Homepage
- Select the homepage that has the tile you want to copy
- Select the ‘edit’ icon in the bottom right corner of the desired tile
- Select ‘Copy To’
- Select the homepage you’d like to copy the tile to
- Save
2. If a tile exists but you do not see it on your homepage:
- Actions List > Personalize Homepage
- Select the desired homepage from the left-hand list
- Select the ‘Add Tile’ button in the top right corner
- Select the System page or folder that contains your desired tile
- Select the desired tile
- Save
3. If a tile does not exist, you can create one on your homepage.
- Navigate to the desired location using the Navigator (in the NavBar)
- Open the Actions List icon
- Select ‘Add to Homepage’
- Choose the desired homepage
Restore Homepage to Default Settings
If you have customized a homepage and decide you’d like to restore it to the default settings, navigate to Personalize Homepage from the Actions List icon. Select the red x to remove the homepage in question. Select ‘Save.’
Then, return to the Personalize Homepage screen, select ‘Add Homepage,’ select the desired homepage (that has just been removed), and select ‘Save.’
Reorder and Remove Tiles from Homepages
There are two ways to reorder tiles on homepages:
1. From the Homepage itself
- Navigate to the homepage you would like to edit by opening the dropdown at the top of the screen
- Drag and drop the tiles into the desired locations
- Changes will automatically save
2. From the Personalize Homepage screen
- Navigate to the Actions List icon
- Select ‘Personalize Homepage’
- Select the homepage you would like to edit from the left-hand list
- Drag and drop the tiles into the desired locations
- Click the green ‘Save’ button in the top right corner
Personalize Favorites
View Favorites
To view your My Favorites list, open the NavBar (compass icon) in the top right corner, and select ‘My Favorites.’ Your favorites menu will expand to the right.
Add Favorites
To add an item to your Favorites, first navigate to the desired location. In the Actions List icon, select ‘Add to Favorites.’ Select OK or change description to save the favorite.
Edit My Favorites
To edit My Favorites, open the NavBar (compass icon) and select ‘My Favorites.’ Select ‘Edit Favorites’ to delete, rename, or reorder your favorites.
My Preferences
MyPack users can customize your settings and preferences by navigating to your homepage and selecting ‘My Preferences’ from the Actions List icon.
Under General Settings, users can select preferences for:
- General Options (e.g. Accessibility Features, Spell Check Dictionary, etc.)
- Regional Settings (e.g. Date Format, Time Zone, Calendar, etc.)
- System & Application Messages
- Navigation Personalizations
- Pop-up Notifications
- Advanced Settings
Be sure to Save all desired changes.
Campus Preferences allow users to select which Career, Term, and Aid Year will appear as default when navigating throughout the portal.